Project Setup
Table of contents
- Initialization
- Converting Shaders
- Preparing Renderers
- Validating
- Automatic Conversion Tool: Convert Open Scenes
Initialization
Before installing Virtual Mesh, make sure to create a back-up of the project!
After adding the Virtual Mesh package to the project, find VirtualMeshConfig, which will be automatically created at Assets/Resources/VirtualMesh. Open it to see whether Virtual Mesh has been successfully initialized. If not, it will display errors with instructions on how to fix them.

Converting Shaders
Virtual Mesh requires using shaders specifically made for it. Only certain types of URP shaders can be converted to Virtual Mesh:
Universal Render Pipeline/Litshould be substituted withUniversal Render Pipeline/Virtual Mesh/Lit.- Converting
Litshaders is as easy as selecting a material and changing its shader toUniversal Render Pipeline/Virtual Mesh/Lit.
- Converting
Lit Shader Graphshould be changed toVirtual Mesh Lit Shader Graph.

Preparing Renderers
Virtual Mesh supports only Mesh Renderers!
For a renderer to use Virtual Mesh, it should have a Virtual Mesh Renderer component. Click Add Component > Virtual Mesh > Virtual Mesh Renderer.
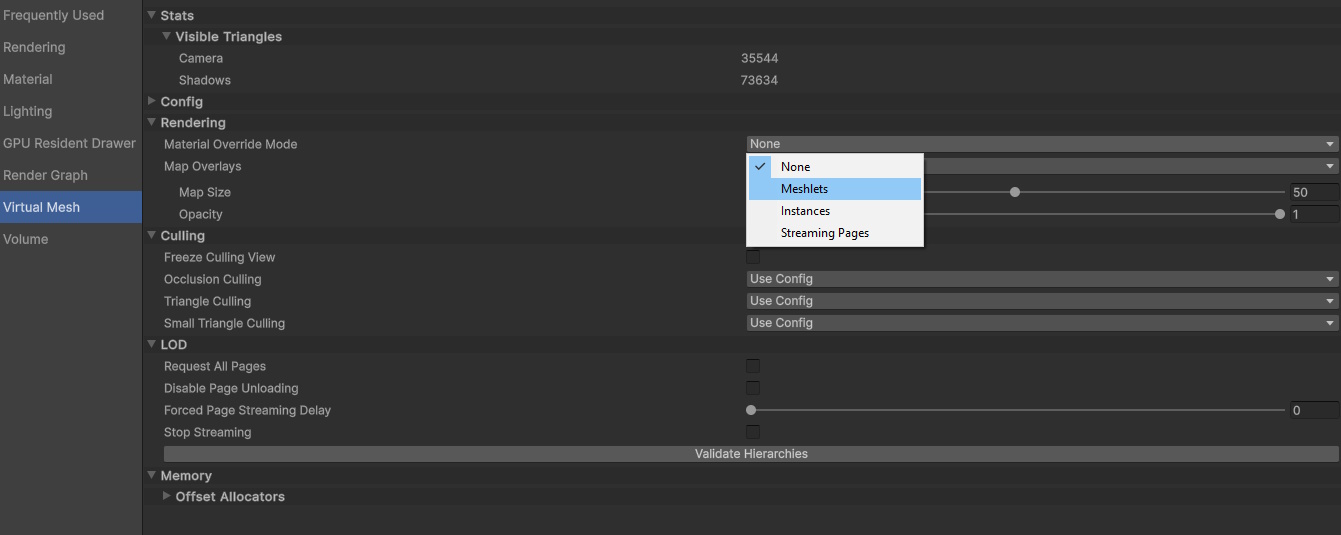
Validating
To see whether the renderers have been successfully setup, go to Window > Analysis > Rendering Debugger:

There, go to the Virtual Mesh tab and change Material Override Mode to Meshlets:
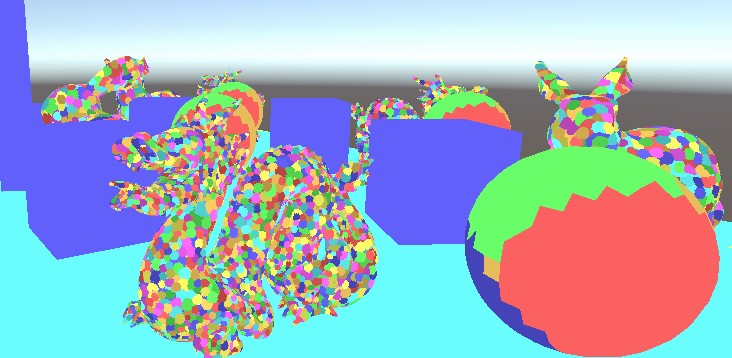
All renderers drawn with Virtual Mesh should be drawn as sets of clusters of different colors:
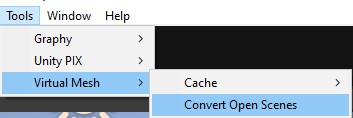
Automatic Conversion Tool: Convert Open Scenes
To simplify converting the content, one can use the utility in Tools > Virtual Mesh > Convert Open Scenes.
What it does:
- Finds all renderers with supported shaders (
Universal Render Pipeline/Virtual Mesh/LitorVirtual Mesh Lit Shader Graph) and adds theVirtual Mesh Renderercomponent to them. - If a material is editable and its shader can be substituted to a one with Virtual Mesh support (e.g.,
Universal Render Pipeline/Lit), it will be converted automatically.